
So not only might you want to change the presentation of the email that you send as an alert, but you may also want set certain custom conditions for when an alert is triggered.
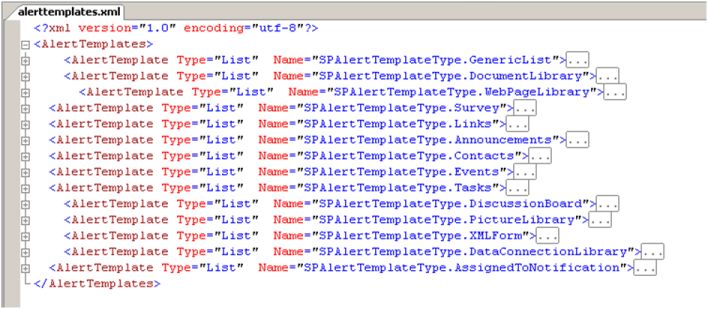
The alert template xml file is located in the 12 Hive at C:\Program Files\Common Files\Microsoft Shared\web server extensions\12\TEMPLATE\XML\alerttemplates.xml, if you open the file you will see all the different alerts for each type of list/library.
Either make a backup of the original file, or create your own copy (we will register the alert file later) and rename the file eg. CustomAlertTempates.xml
Copy the GenericList
If you expand this node you will see the child nodes EventTypes, Format (Digest & Immediate), Properties, and Filters.
If we look at the Format Node first, there are two types of formatting available, Digest and Immediate. Each contains a large amount of xsl/html that controls the output html of the alert email. The digest node controls the daily/weekly summary alerts, and the immediate node controls the alerts sent immediately (obviously!).
Change some of the html in the Immediate node so you can test whether the alert is using your template, eg.
The next step is to register and test your new alert type. For this you use STSADM from the command prompt to register the new alert file for a particular Site Collection.
stsadm -o updatealerttemplates -url http://yoursite/sites/sitecollname -filename “C:\Program Files\Common Files\Microsoft Shared\web server extensions\12\TEMPLATE\XML\CustomeAlertTemplates.xml”
Now to set a particular alert to use your new specific template, you can set the AlertTemplate for the list programmatically.
SPList spList = null;
spList = spWeb.Lists[listName];
SPAlertTemplate newTemplate = new SPAlertTemplate();
newTemplate.Name = “SPAlertTemplateType.MyCustomAlertType“;
spList.AlertTemplate = newTemplate;spList.Update();
Or you can create an individual alert programmatically…
SPAlert spAlert = spUser.Alerts.Add();
spAlert.Title = alertName;
spAlert.EventType = SPEventType.Modify;
spAlert.AlertFrequency = SPAlertFrequency.Immediate;
spAlert.AlertType = SPAlertType.List;
spAlert.List = spWeb.Lists[listName];
spAlert.Filter = QueryBuilder(spUser.Name);
SPAlertTemplate newTemplate = new SPAlertTemplate();
newTemplate.Name = “SPAlertTemplateType.MyCustomAlertType“;
spAlert.AlertTemplate = newTemplate;
Once this has been registered, recycle the web app application pool, or reset IIS, then test the new alert. You should find the email alert will now include your new HTML.
So that’s how to change the HTML of an alert, in the next post I’ll create a new custom filtering option that will appear through the UI.
TIP: By default the timer job that runs the alert jobs runs every 5 minutes. And if you’re debugging that can be a painfully slow process, unless you enjoy heaps of coffee breaks! Anyway I decided I didn’t need that much coffee, so I changed the alert timer job to run every minute instead of every five.
SPJobDefinitionCollection spJobs = SpWeb.Site.WebApplication.JobDefinitions;
foreach (SPJobDefinition job in spJobs)
{
if (job.Id.ToString() == TaskGuid)
{
string guid = job.Id.ToString();
string name = job.DisplayName;
SPMinuteSchedule newSchedule = new SPMinuteSchedule();
newSchedule.BeginSecond = 0;
newSchedule.EndSecond = 59;
newSchedule.Interval = minutes;
job.Schedule = newSchedule;
job.Update();
}
}


No comments:
Post a Comment